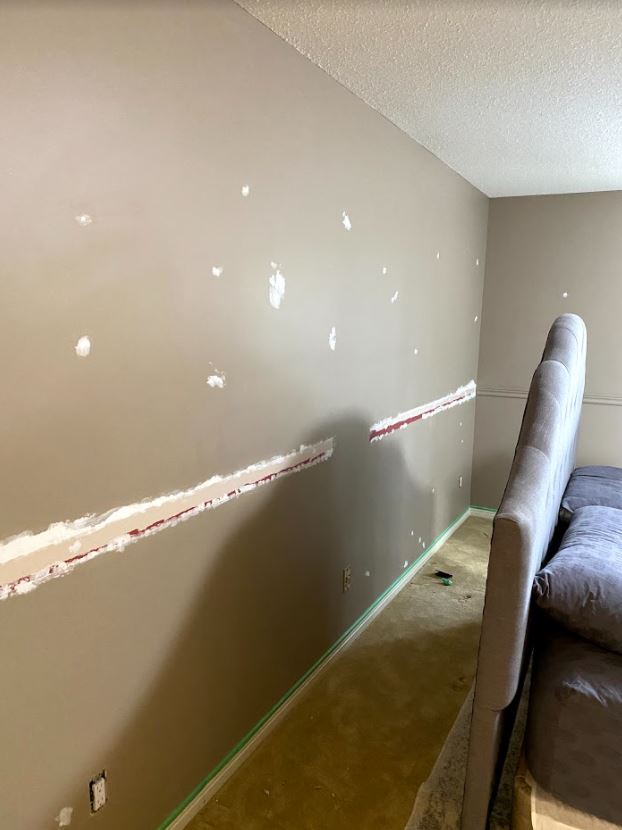
This was the first biggish project that we have completed in our new house. First of all, we wanted to get rid of the icky colour on the walls….Second, we needed to remove the terribly lopsided chair rail….Would you believe that someone would install a chair rail…by going from each side the wall, meeting in the middle (oh wait, no, they ran out of material before getting to the middle of the wall) then realize one side is about an inch and a half higher than the other and just leave it….Yup! That’s what we were working with. Goodbye chair rail!
Repairs and Prep
I feel like this part of the job often takes the longest, or maybe it just feels that way because I am just excited to get to the fun stuff!
Once the chair rail was removed, we had to do a bunch of repairs to the wall. A couple words of wisdom on this one…When you are patching, spread the spackling out thin on the edges and go pretty far beyond the area you are actually repairing. Let it dry, sand it, and do it again! Repeat as needed.
For prep, please tape! The previous owners didn’t and what a mess! Trying to cover up the brown was hard enough, the ceiling and the baseboards all needed a touch up at the end due to the poor job that was previously done! This turned our 2 day job into a 4 day job.
Board and Batten Install
Materials
- 10 pack of 1 1/2 inch x 2 1/2 inch x 96 inch MDF Primed Boards
- Caulk for Paint Projects
- Caulking Applicator
- No more nails glue
- Finishing nails
- wood filler
- Sandpaper
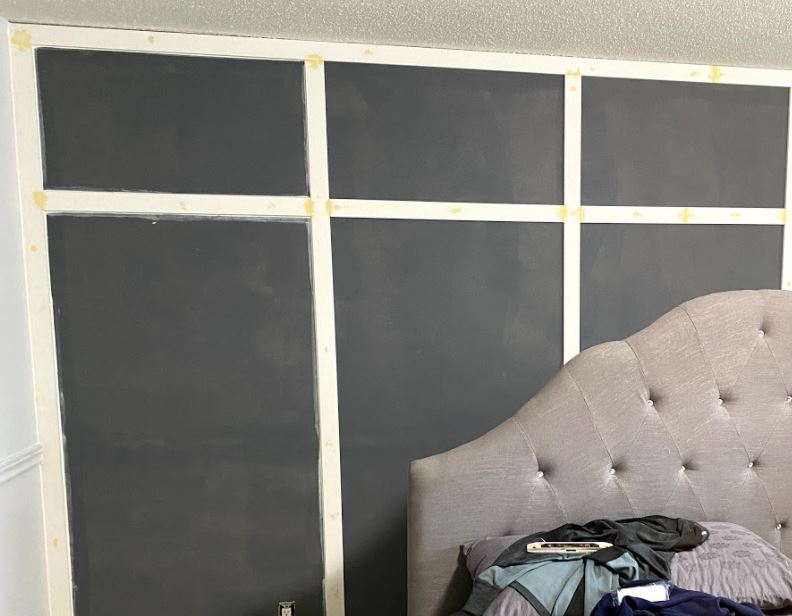
Now comes the fun stuff! There is definitely some math involved in this project to make sure you have your board and batten spaced evenly. Once you decide how you want it to look, and there are a number of different looks. Just check out Pinterest for some inspiration. This was mine.
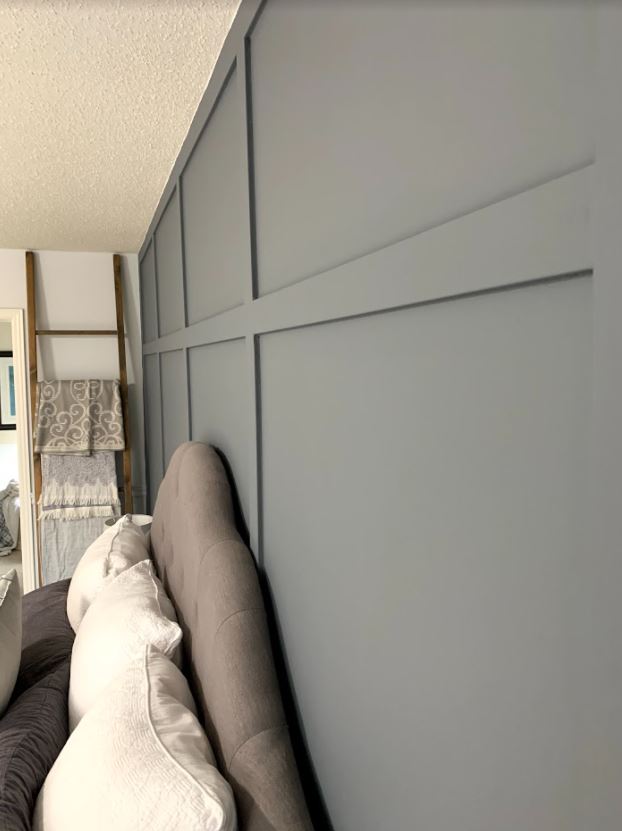
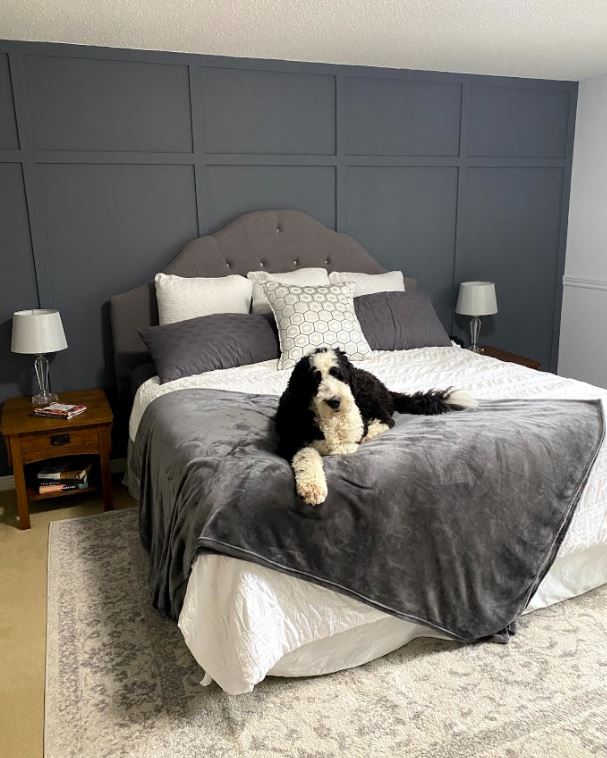
Before attaching any boards to the wall, I did one coat of the paint, in order to save me some time later. We used Benjamin Moore – Grey Shower.
So before you start making any cuts or attaching anything to the wall, keep in mind…walls and ceiling are hardly ever square. Therefore, make sure when you are measuring your boards, measure them exactly where you are wanting to fasten them…you’d be surprised the difference from one end of the wall to the other sometimes.
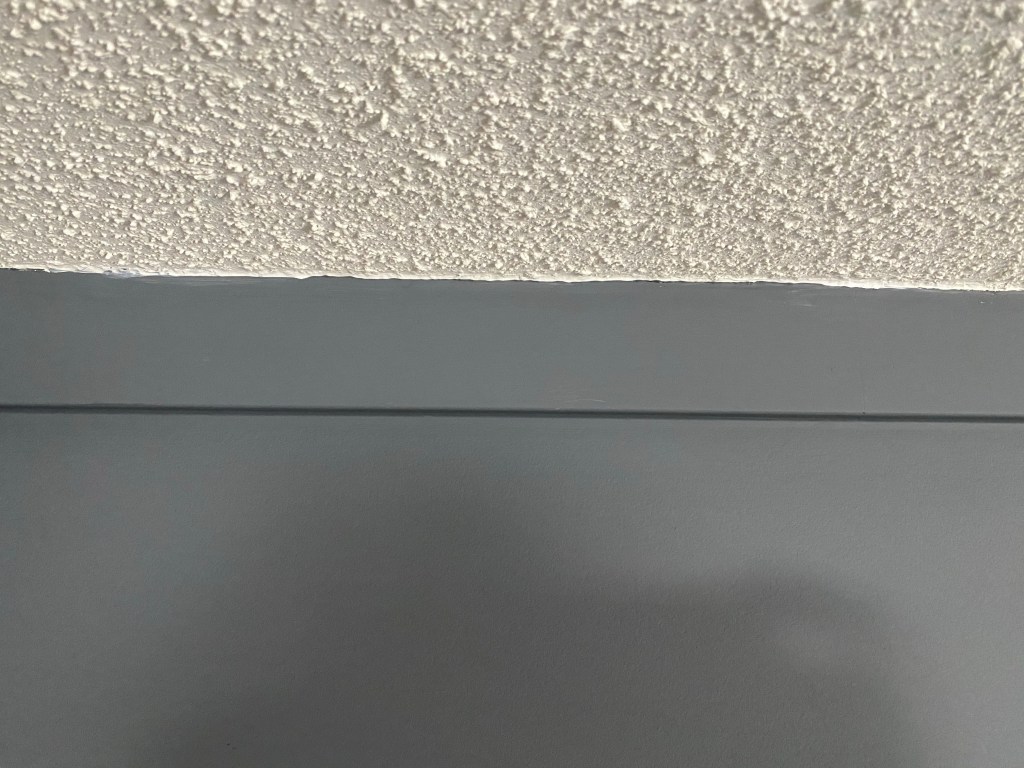
We installed our horizontal piece, along the top first, which turned out to be kind of challenging due to our popcorn ceiling. You always have the option to shave away the stucco so that your piece fits flush to the ceiling. We didn’t because I was going to be caulking along each seam anyways and that would fill in any gaps. For the horizontal piece along the bottom, this is optional. Some examples included it, others didn’t because they already had baseboard. It totally depends on the look you are going for. We decided not to do it because it wasn’t going to look right with out current baseboards…maybe we will make that change in the future.
Next were the vertical boards. We started on the outside and worked our way in because we wanted to make sure everything was centered to the middle of the wall. We were working with a fairly large wall (15 feet) so we spaced our boards 34 inches apart. If you are working with a smaller wall, space them a little closer together. Again, totally up to your personal preference and how many panels you want. We went for 5 panels because we like the look of having the odd number to center the room.
Finally, we placed the other horizontal pieces. We just did one row and placed it in the upper quarter of the wall. This helped to elongate the wall as a dark colour can sometimes make it look shorter. We also made sure that it sat higher than our headboard, or any headboard that we may get in the future (yes I want a new bed now).
Once all your boards are in place with no more nails on the back and finishing nails through the front, you can start patching and sealing everything up.
First, make sure you set all of your nails flush or even slightly inset, so you get a nice smooth surface in the end. Go over any holes or seams on the boards with wood filler (yes, I know we aren’t working with wood, but it dries quickly and sands easily.)
Next, is my favourite part, the caulking! This is probably one of the most important steps because it really finishes off the look and for those lumpy uneven walls you have, you won’t notice if the boards aren’t sitting completely flush. Along every seam, where the board meets the wall, use a caulking that is specifically for paint jobs, this way it won’t leave any sheen when you paint. Use one of these caulking applicators to make sure you get a nice smooth application and ensure the caulking gets into all the cracks and gaps.
As I mentioned at the beginning, the popcorn ceiling made it a little challenging to sit the horizontal pieces flush to the ceiling. As you can see, the caulking helps it all blend together.
Finally, the painting! Because I had already done a coat prior to installing the boards, I only need to do another coat all over and an additional coat on some of the boards where I wasn’t generous enough with the paint. We chose a matte finish paint because it will hide any flaws in the wall. The trickiest part was definitely painting along the ceiling. A small art brush and a very steady hand was the only way to do it. Every time I paint accent walls I remember why I don’t like painting them. The corners are always the toughest because, again, walls are never perfectly square. Corners are always a little rounded. A paint guide will definitely help.
Thanks for following along on our first big project in our new home and my first big blog post! I hope you found it helpful if you are planning a project of your own. If you have any questions or think I missed any important information, I would love your feedback!
I can’t wait to share all of my future projects with you!

2 thoughts on “Master Bedroom Board and Batten Project”