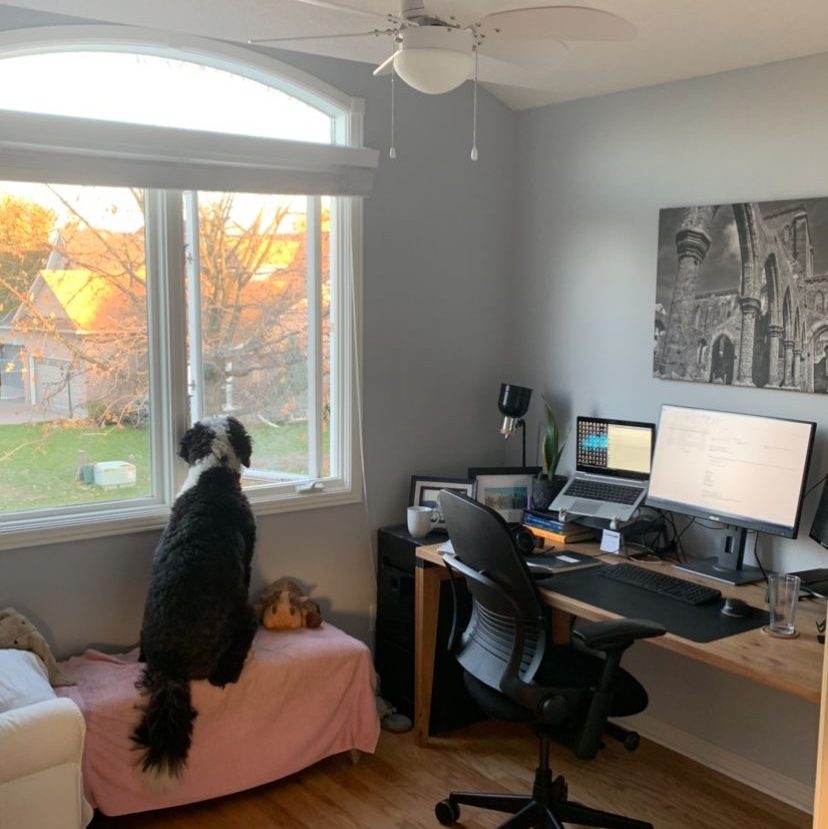
With my hubby out of town for a few days, it was a perfect opportunity to make over his office. It was a tired light blue room with dinged-up walls, tired baseboards and just looked rather rough. Certainly not an inspiring space to spend the majority of your day working, although the dog did love the set up.
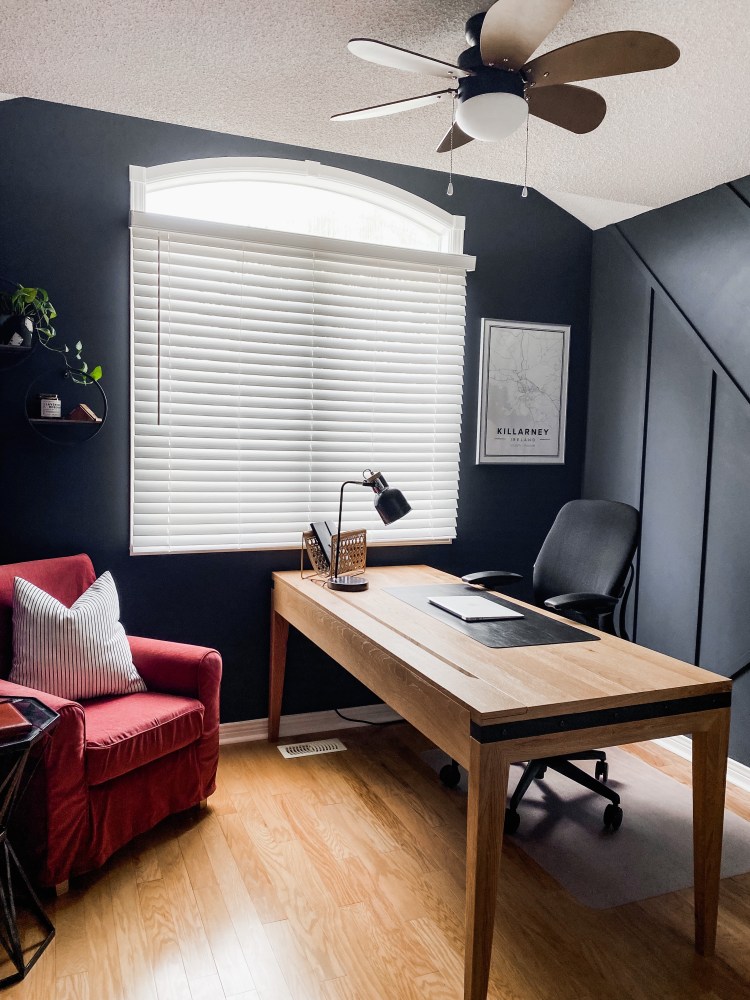
My husband has talked about wanting a dark blue, moody room for ever, so that made the paint decision very easy! Benjamin Moore’s Hale Navy was the winner. It’s deep, it’s dark, its gorgeous in any lighting. The office is is at the front of the house and faces east, so we get the morning sunshine and this colour looks absolutely gorgeous in the morning light.
Ive been wanting to give an asymetrical accent wall a shot, and thought this was the perfect room for it. As I did with our bedroom wall, I used pieces of primed mdf. With wood prices still fairly high, this was a great alternative, and is just so easy to work with. Just deciding the layout of this wall was probably the toughest part of the job. I actually used a spare wall, of a similar size, to plan it out.
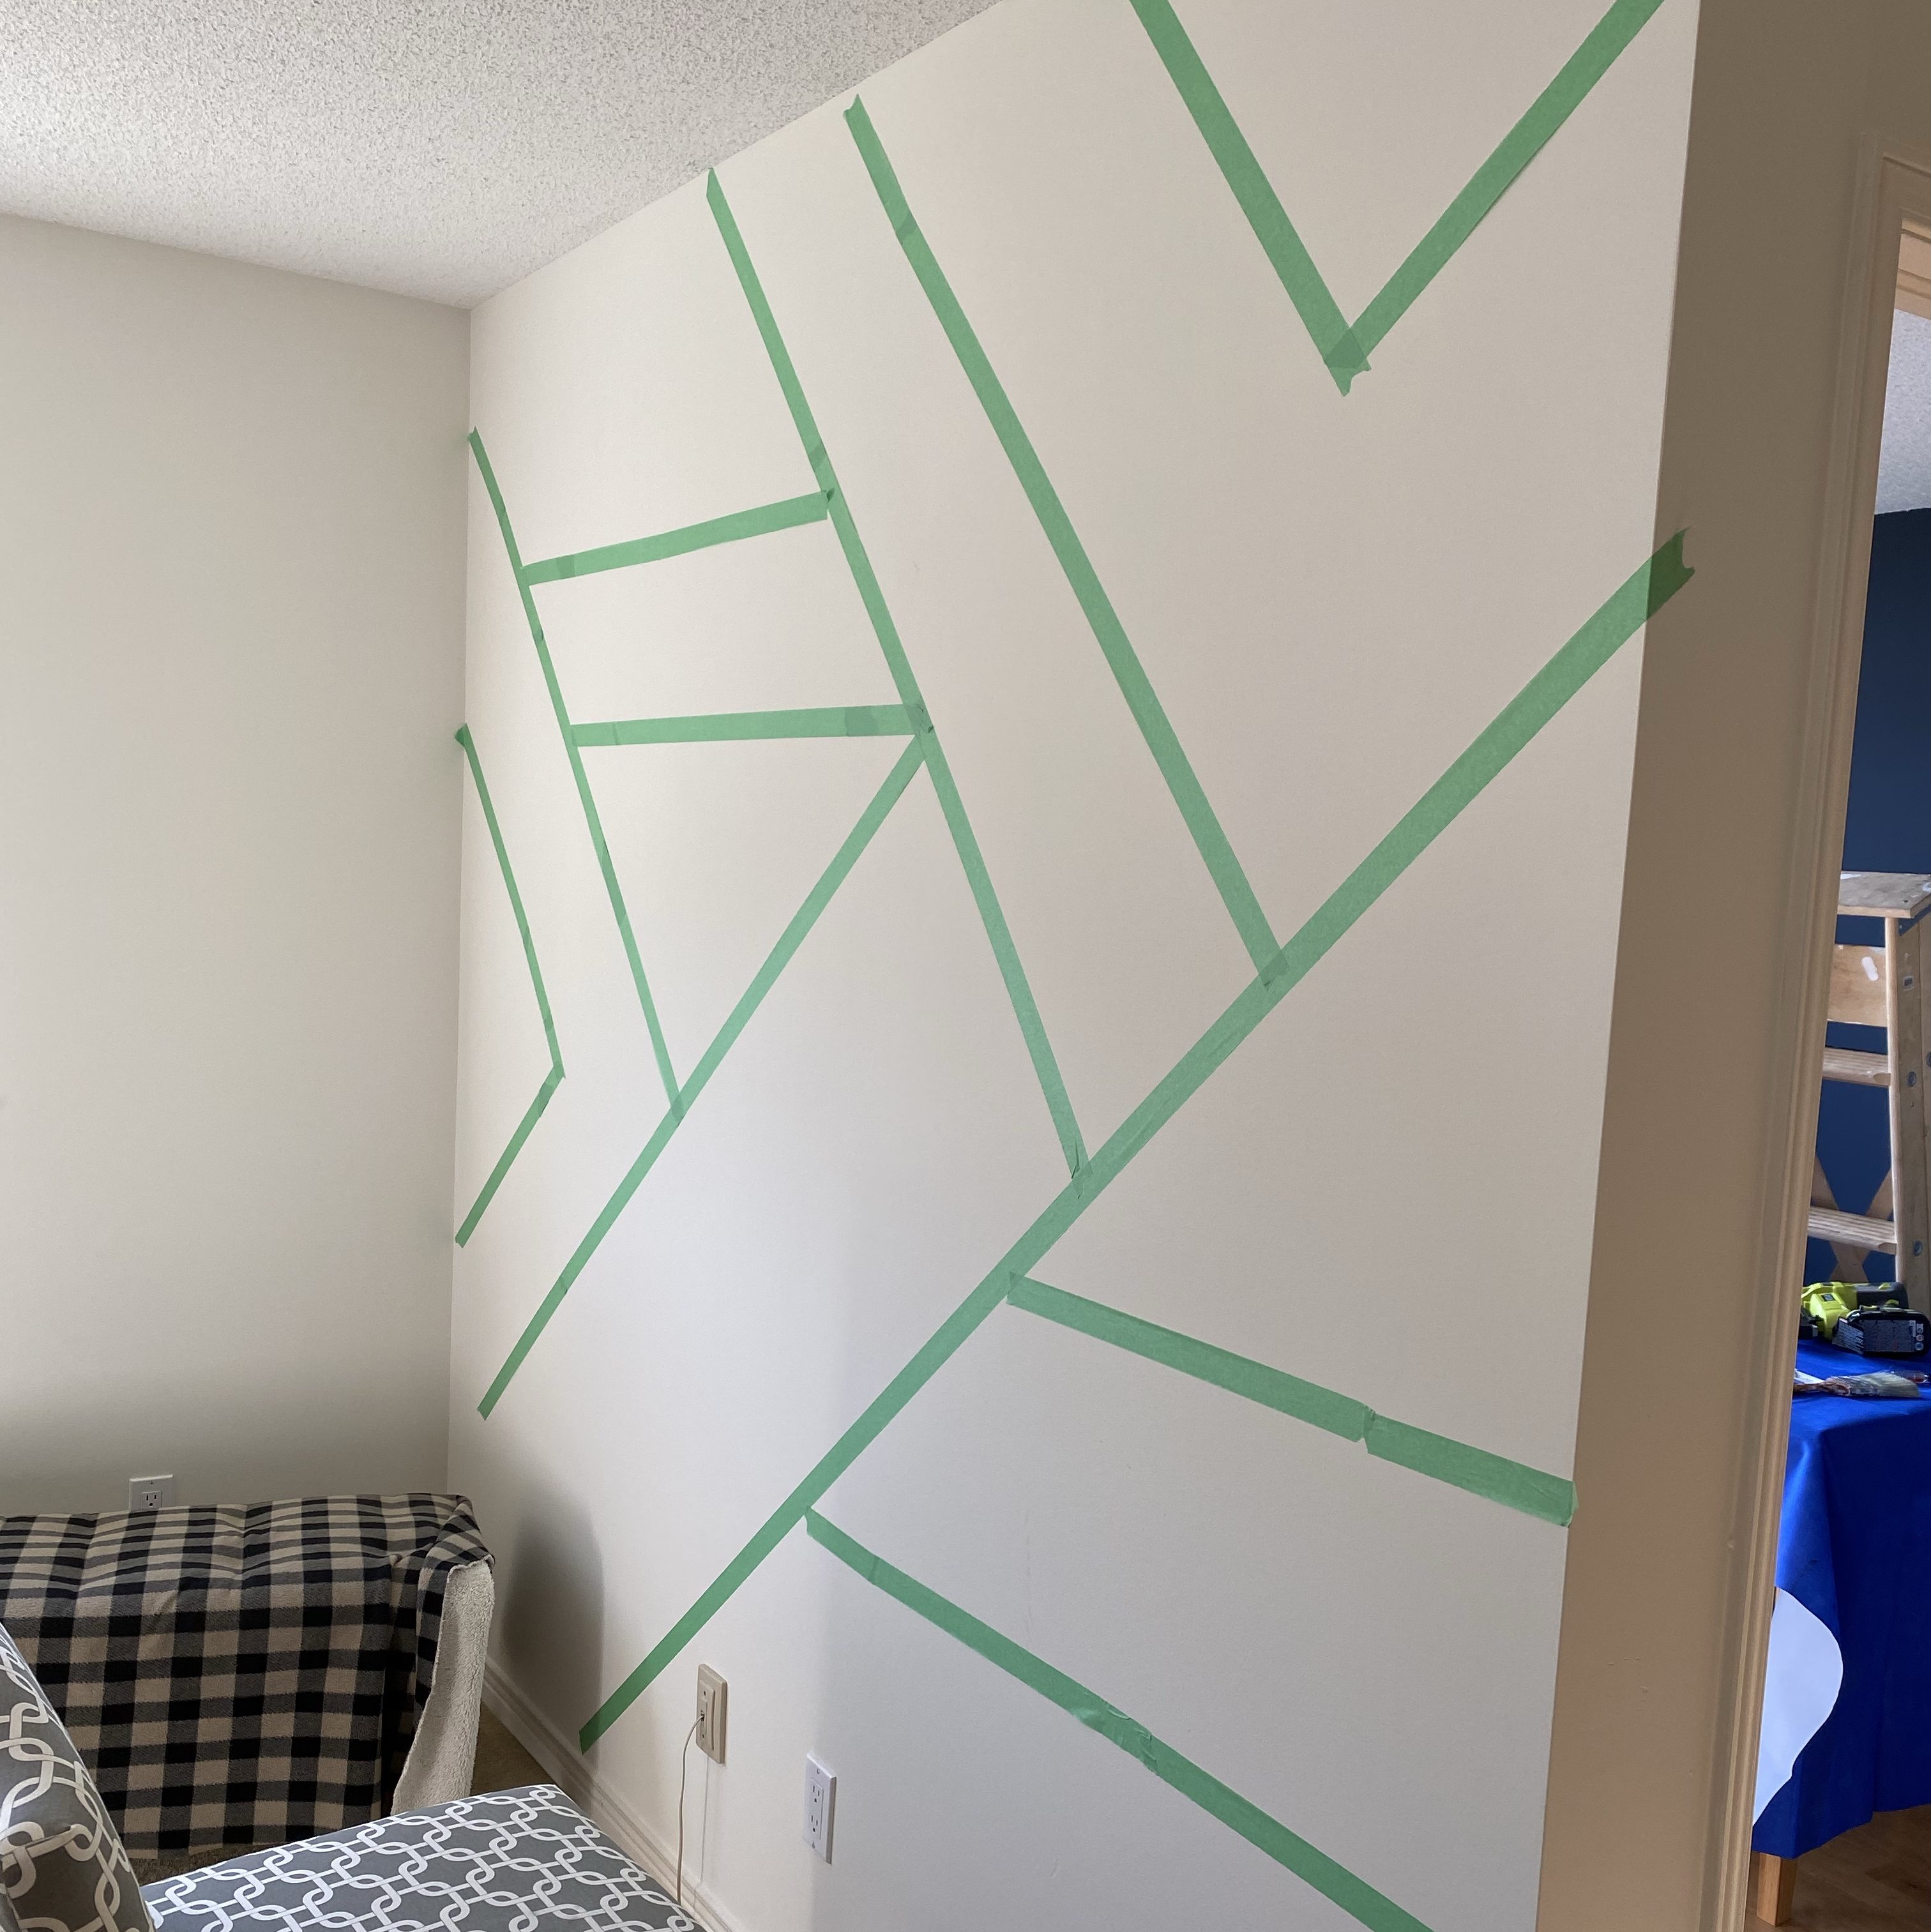
I spent a long time trying different designs, even after planning it out on this wall, I ended up doing something completely different. I am more of a let’s just wing it kind of person….
I knew whatever the design was, that rolling the wall afterwards would be difficult, so I did put two coats of paint on the wall before applying the mdf.

For anyone else that likes to wing it. I suggest starting at one side, place a board that you for sure know that you want, then work your way across the wall, thinking about maintaining spacing so that it does look like it’s planned out.
I knew that I wanted to work with 45 degree angles and 90 degree angles only, to keep things simple. When you get into a bunch of different angles, it will just make your design more complicated to piece together, especially if you haven’t planned out your design exactly.
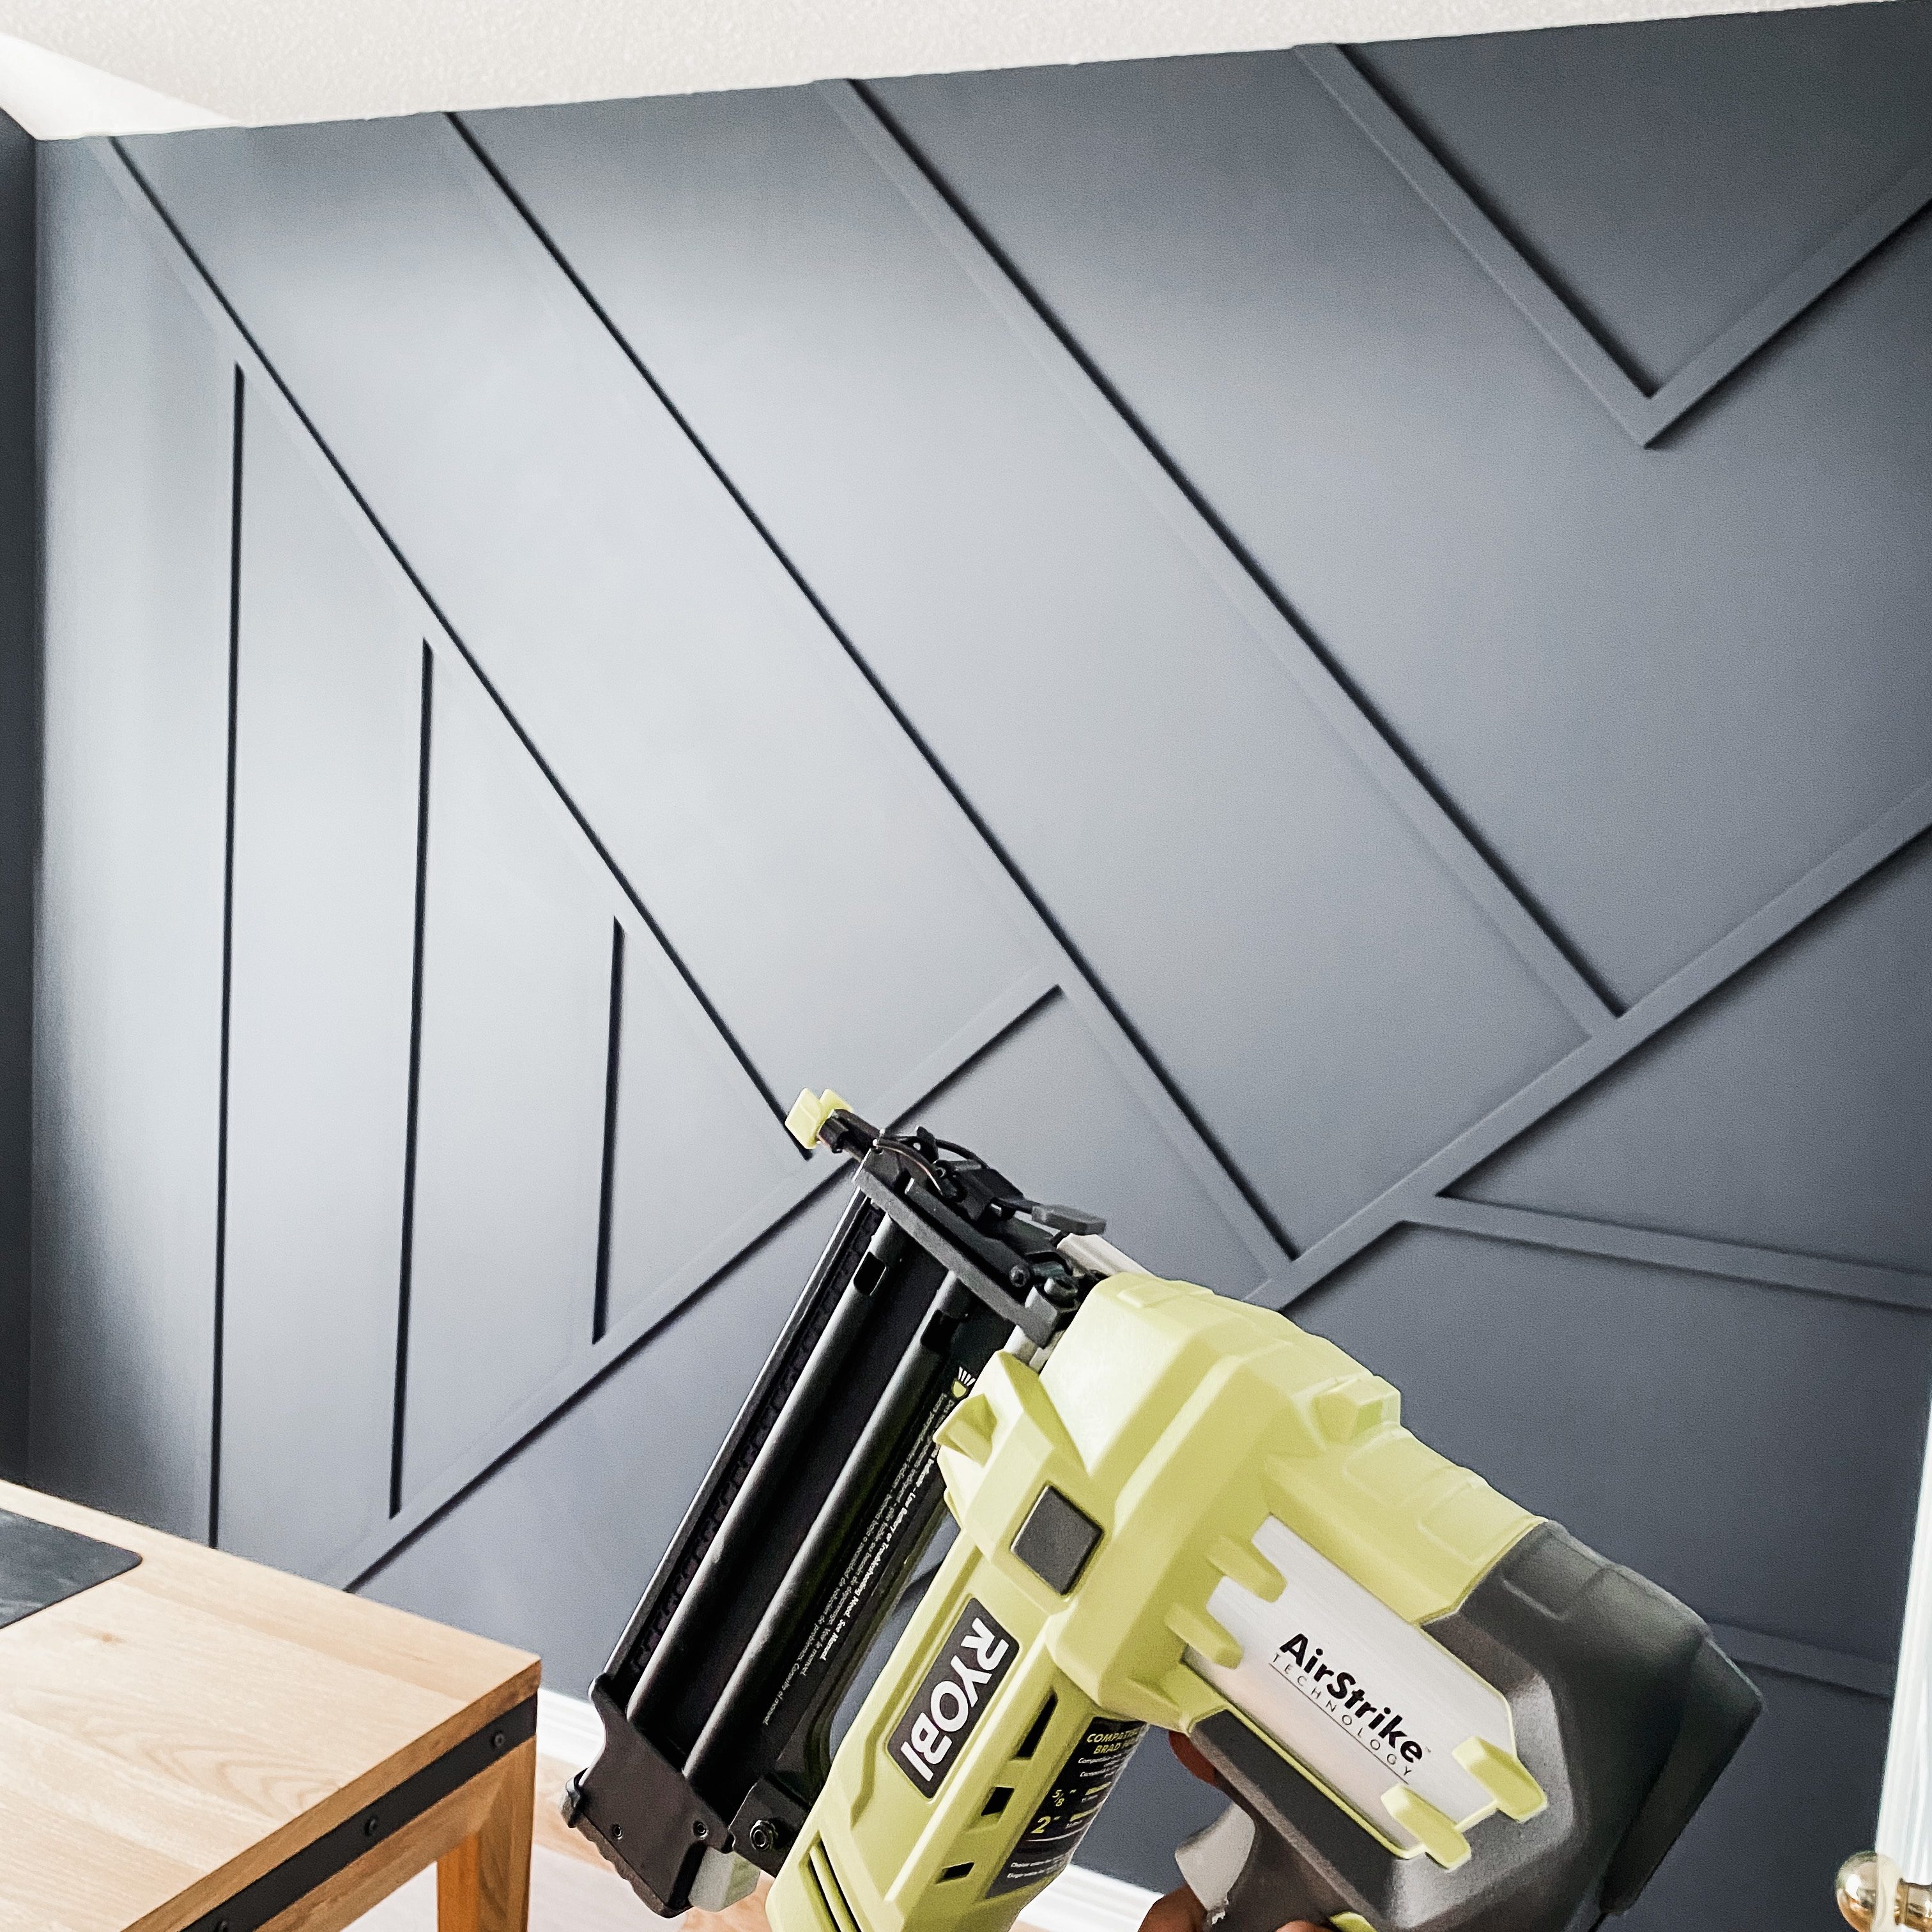
I used Ryobi’s Brad Nailer to attach my boards. I love using this machine. The brad nailer uses 18-gauge nails which leave behind nice small holes that are easy to fill. The flexibility of the wireless tool is great too when you are up and down ladders and moving around furniture.
I didn’t end up using any glue or caulking this time. I found that working working with 45 degree angles, I was having to readjust the placement of the boards a few times before nailing them in place. This would have been very messy if I had ended up using glue in the process as well. I then decided against the caulking because I liked the look of the sharp edges, rather than the rounded edges you get with the caulking sometimes. It made for a more modern look.
I used wood filler to fill the nail holes and make the joints disappear. Finished that up witha quick sand and then a couple coats of paint and a final coat over the whole wall.
Decorative Details
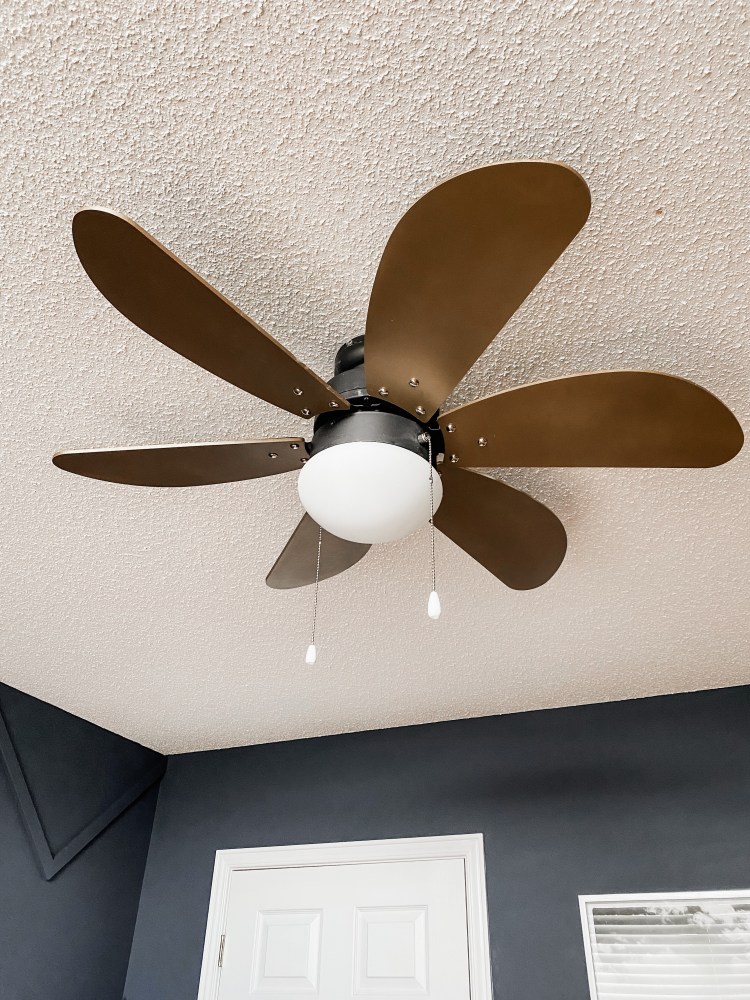
- I spray painted the white fan to give it a more industrial look
- The ikea slip cover chair got a new look with a new cover. The rich red compliments the sophisticated, moody blue walls.
- I positioned the desk in the middle of the room to provide my hubby with some more privacy while on virutal meetings. There are many times I have found myself crawling across the ground to get something from the room just so I’m not seen on camera. Many times I was not successful and was seen crawling across the floor in the background.
- The wall art was inspired by a black and white canvas print that my husband already had in the office. I carried the black and white theme throughout all of the wall art. It compliments the moody sophistication of the room.
- My husband likes to have a clear work surface, so adding a couple shelves allowed him to clear his desk of his pants and other decorative items.
- I switched out the very large filing cabinet for a smaller set of drawers that were more practical for what he needed.

One thought on “Home Office Surprise”