
A How To
I’ve seen a few people on Instragram making these lovely greenery arrangements using floral foam and carving them into Christmas trees. Well, I only had a couple small pieces of the floral foam left, but had a bunch of tree clippings left from doing my other arrangements.
Enter the Itty Bitty Adorable Christmas Trees.
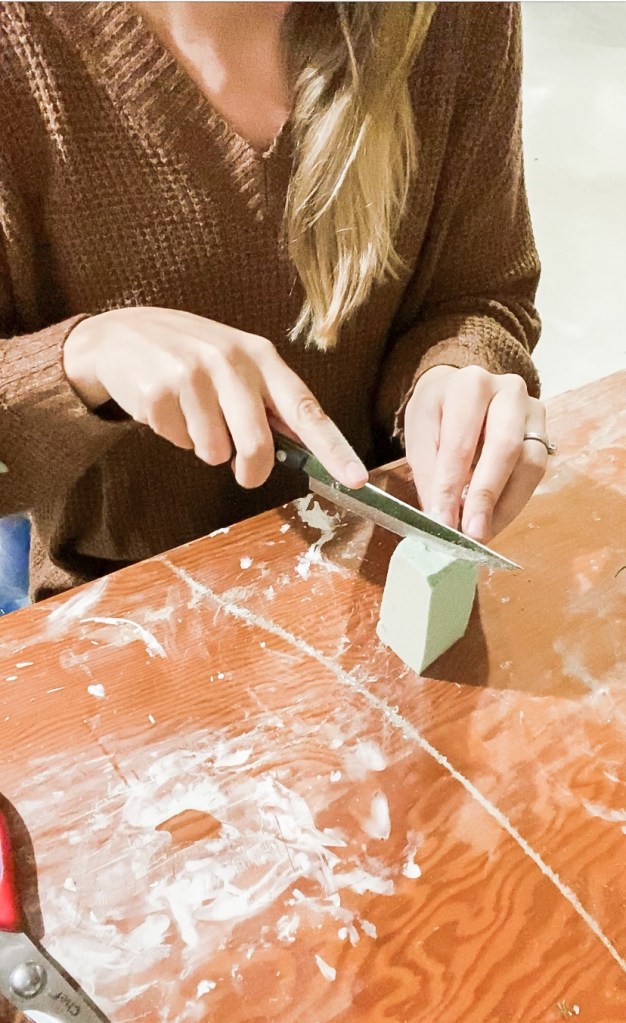
Step 1: Shave your pieces of floral foam into a tree like shape. This is easy to do if your pieces of foam are square at the base, mine were not. They don’t have tp be perfect and if you have a flat side, no worries, you can manipulate the shape of it with the tree clippings later on.
Step 2: Trim your tree clippings into appropriate sizes. I used pine tree clippings, as they have smaller needles to begin with so it was going to make it easier for putting together the trees. Because my trees are no more than 2 inches tall, I made my clippings about a 1/4 of an inch in length. My clippings varied in length slightly, keeping the larger pieces for the bottom and the shorter for the top.
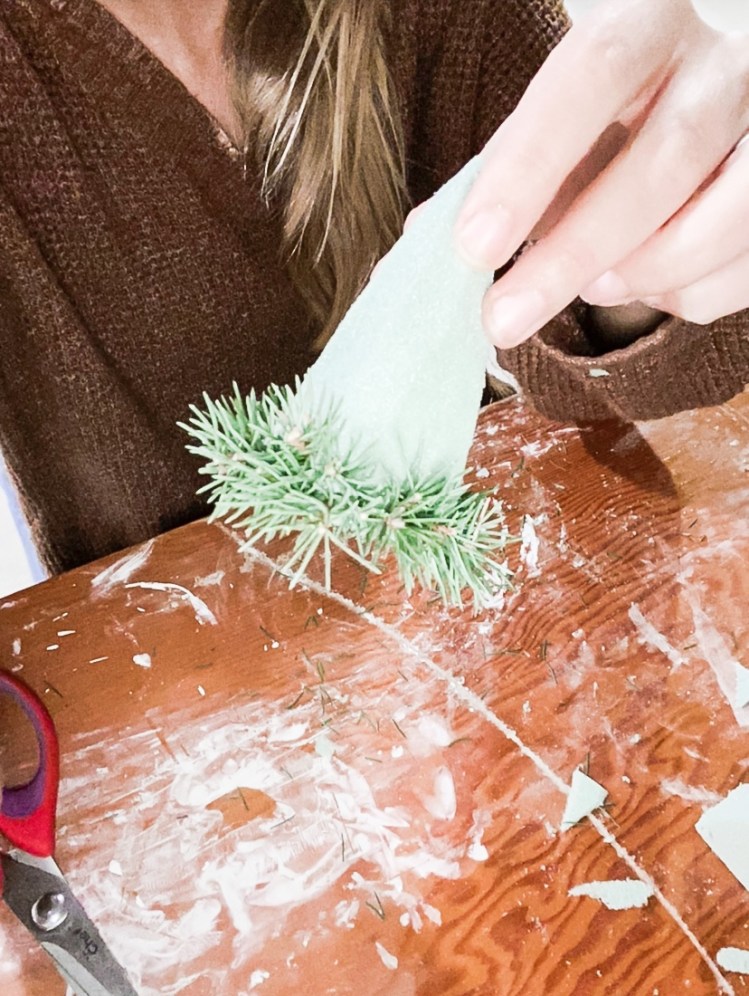
Step 3: Simply poke your tiny little clipping pieces into your floral foam. I started at the bottom and worked my way upwards but I don’t think it really matters what end you start at.
Hint: To give your trees a little more longevity and prevent the needles from dropping, use the wet floral foam, soak your clippings or simply mist your trees with a spray bottle every day.